The GodotGAS Dashboard
GodotGAS is designed to be a deeply data-driven framework. To prevent typos and broken references, you should rarely have to type a tag or stat name manually into a string field.
Instead, GodotGAS provides a custom Editor Dashboard. You can access it at any time by clicking the GodotGAS tab at the top center of your Godot Editor (next to 2D, 3D, Script, and AssetLib).
The dashboard is split into three main tools:
1. The Tag Manager
Stop hardcoding strings. Start using validated Gameplay Tags.
In standard Godot, developers often check states using booleans (is_stunned = true) or strings (if state == "Burning"). Both are prone to typos and don’t scale well. GodotGAS uses StringNames formatted as hierarchical tags (e.g., Status.Stunned.Heavy).
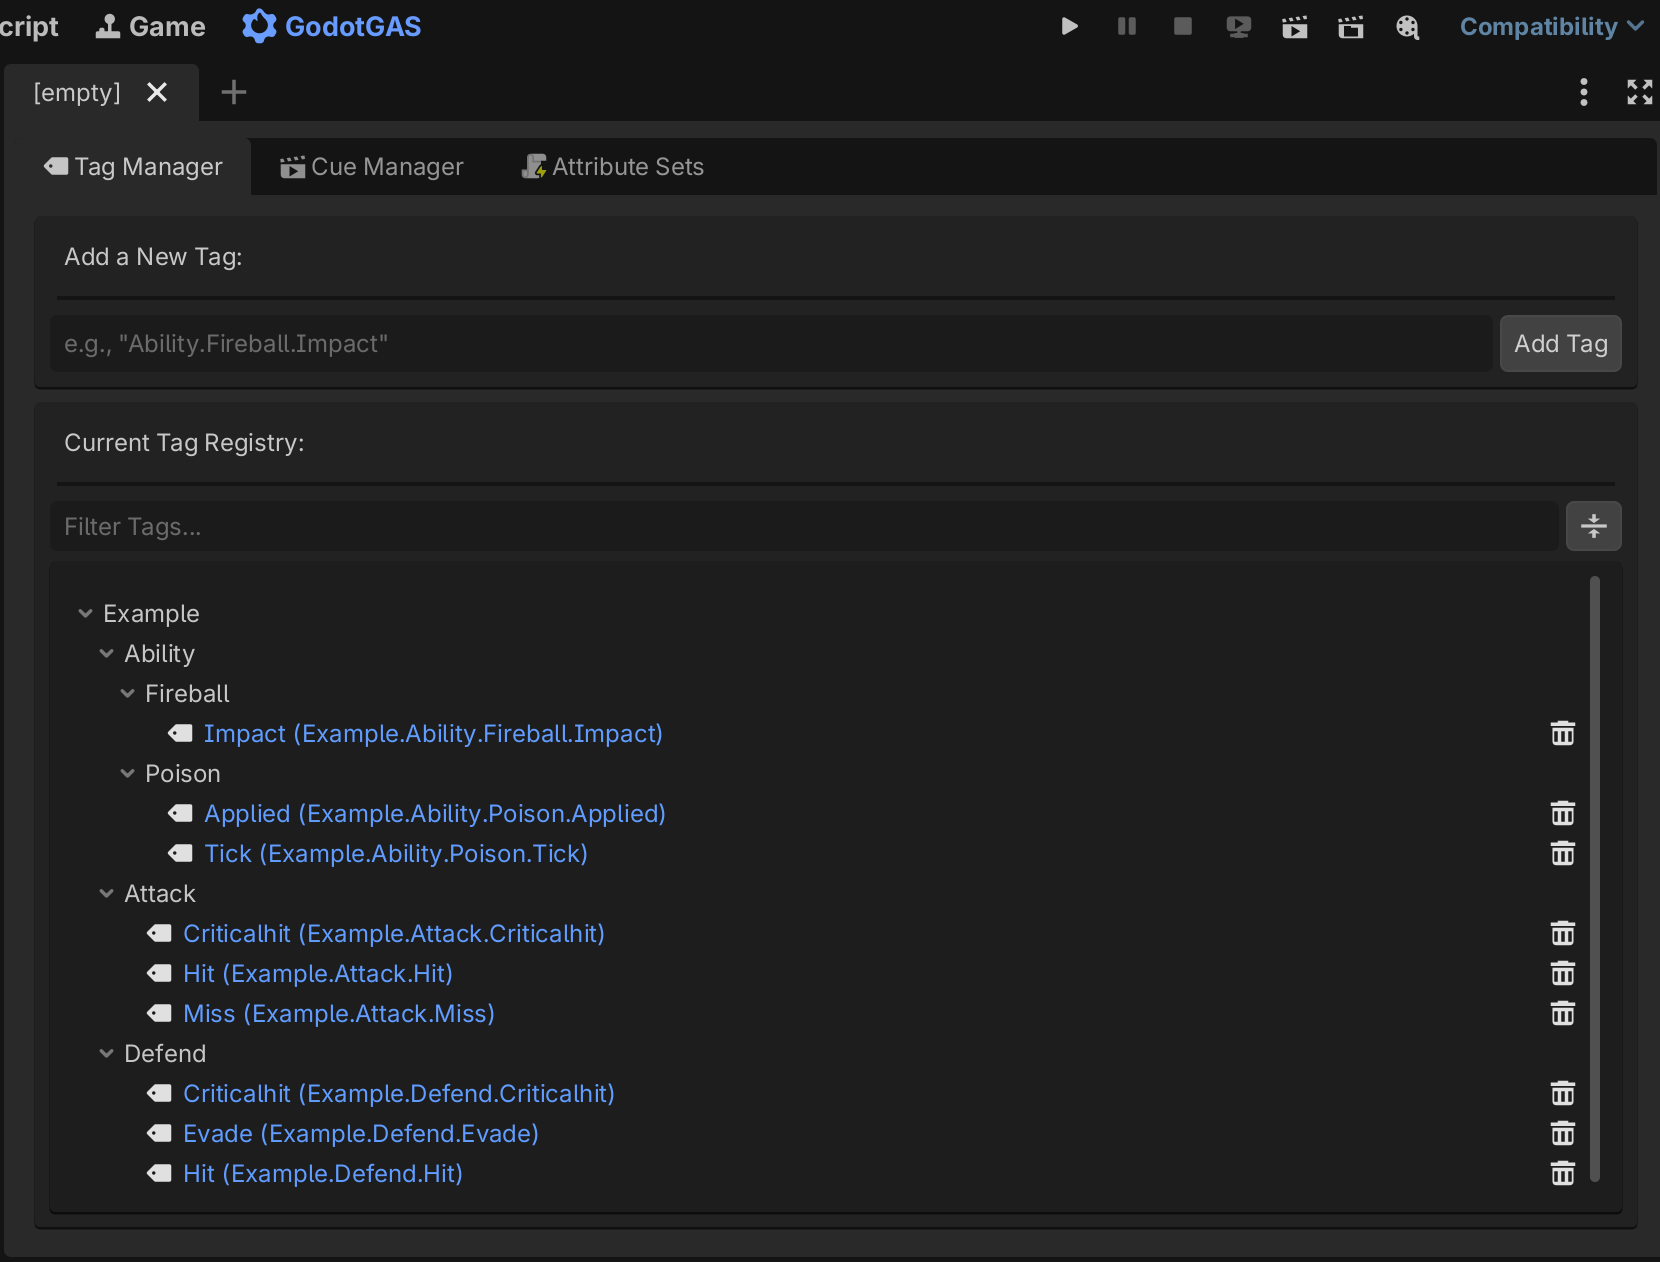
The Tag Manager is where you define these tags.
- Hierarchical Tree: All tags are visually grouped by their parent categories (e.g., all
Status.*tags are grouped together). - Regex Validation: You cannot create invalid tags. The dashboard forces you to use the
Category.SubCategory.Nameformat, ensuring your tags are clean and parseable. - Auto-Generation: When you add or delete a tag, the dashboard automatically updates
gameplay_tags.gd. This allows you to reference tags in code securely (e.g.,GameplayTags.Status_Stunned).
Using Tags in the Inspector
Because tags are strictly registered, any script that exports a tag variable using the word tag (e.g., @export var ability_tag: StringName) will automatically receive a custom drop-down menu in the Godot Inspector! You will never have to type a tag manually in the inspector again.
2. The Cue Manager
Link your visual and audio effects without writing code.
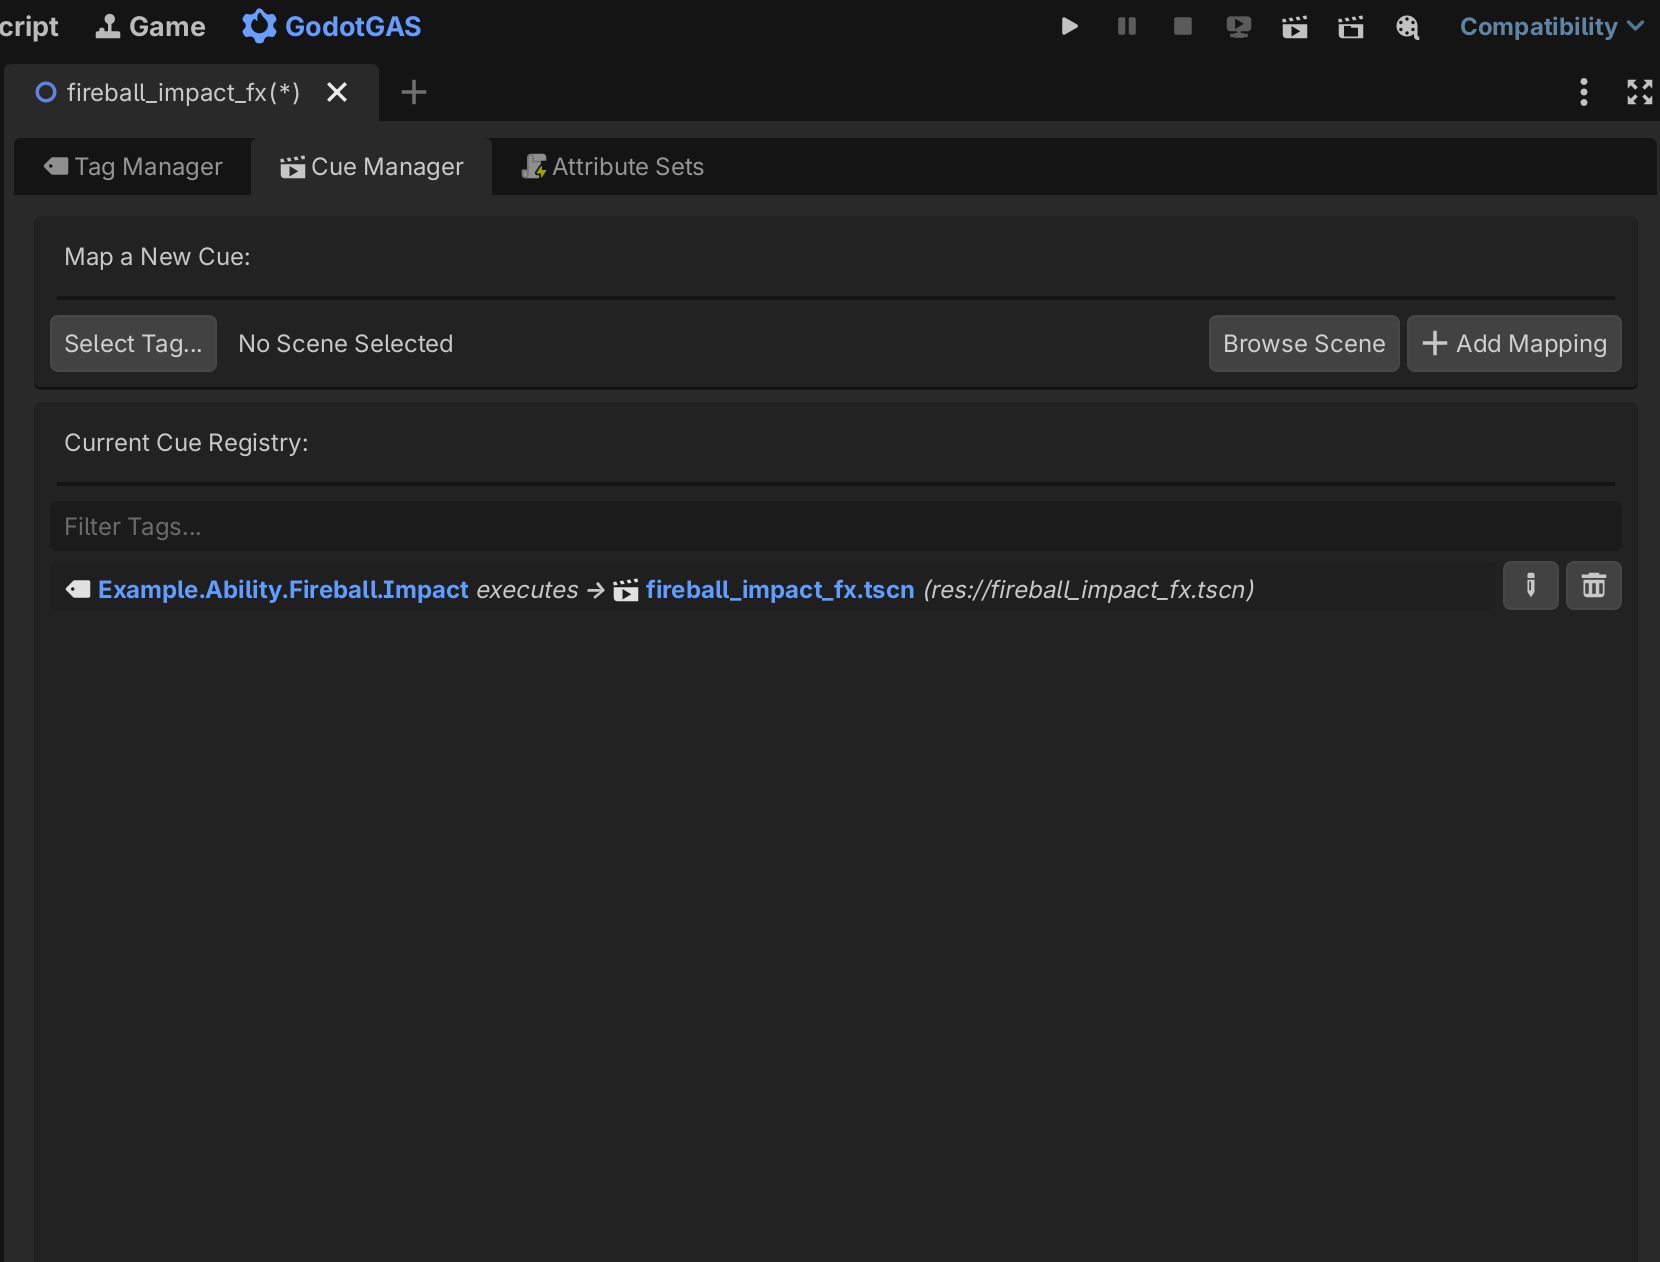
The Cue Manager bridges the gap between your game’s data and its presentation. This is where you map a specific GameplayTag to a PackedScene (.tscn).
- How it works: When a
GameplayEffectis applied, it might tell the system to trigger theCue.SFX.Fireball.Impacttag. The system looks in this registry, finds the mapped.tscn(perhaps an explosion particle with a boom sound), and spawns it using the Object Pool. - Safety First: The dashboard prevents you from mapping the same tag to multiple scenes, ensuring your audio/visual triggers are always 1:1.
3. The Attribute Set Generator
Draft stats visually. Generate C++ style scripts instantly.
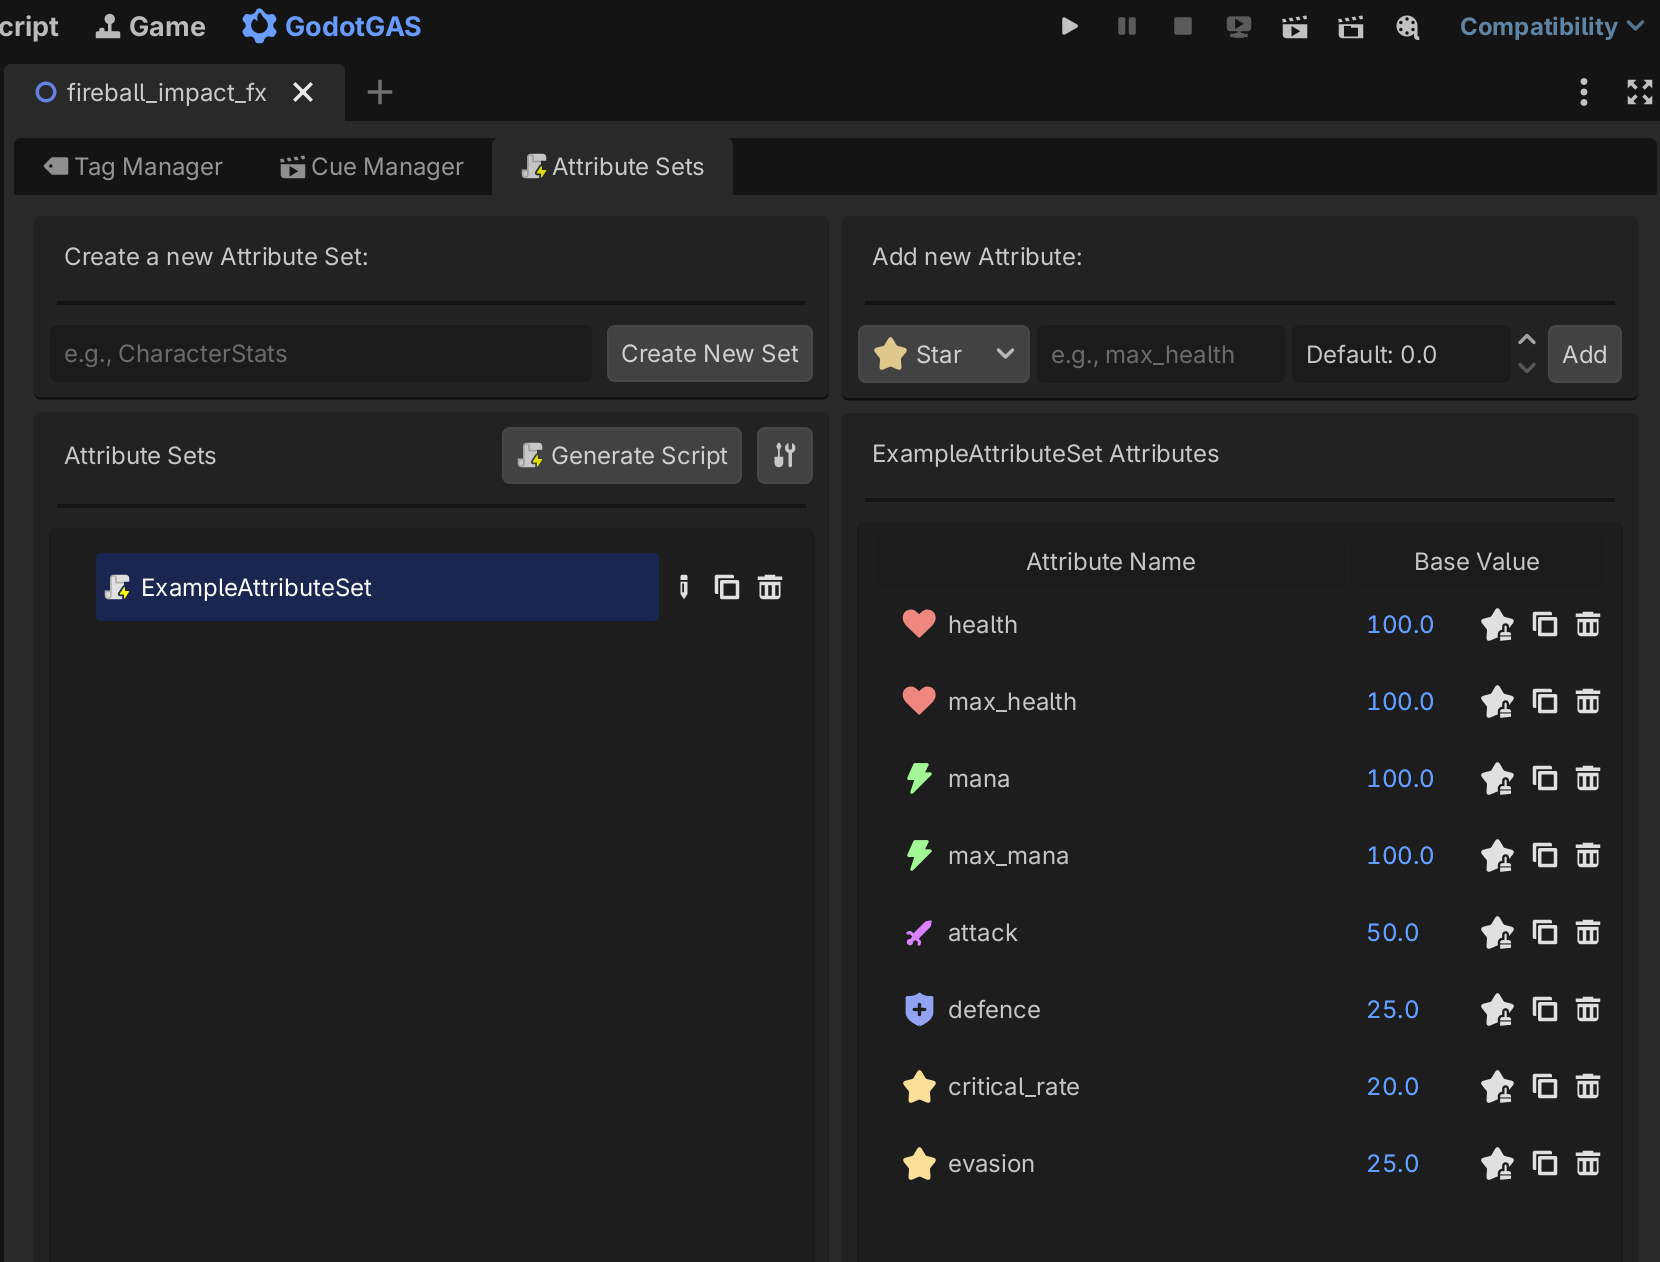
Writing boilerplate code for RPG stats (Base Value, Current Value, clamping limits) is tedious. The Attribute Set Generator allows you to build your stats visually before compiling them into code.
- Drafting: Create a new set (e.g., “PlayerStats”). Add attributes to it (e.g., “health”, “max_health”, “mana”).
- Icon Mapping: Assign an editor icon to each stat so it’s easily recognizable at a glance.
- Generation: Click “Generate Script”. GodotGAS reads your visual draft and writes a heavily documented, syntactically perfect
.gdscript extendingAttributeSet. It automatically builds all the underlyingAttributeDataresources for you.
Where do they save?
By default, the plugin saves generated Attribute Sets to res://gas_attributes. You can change this by clicking the Settings Tool Icon in the Attribute panel next to the Generate Script button and browsing for a new local directory in your project.